SET UP OPERATION
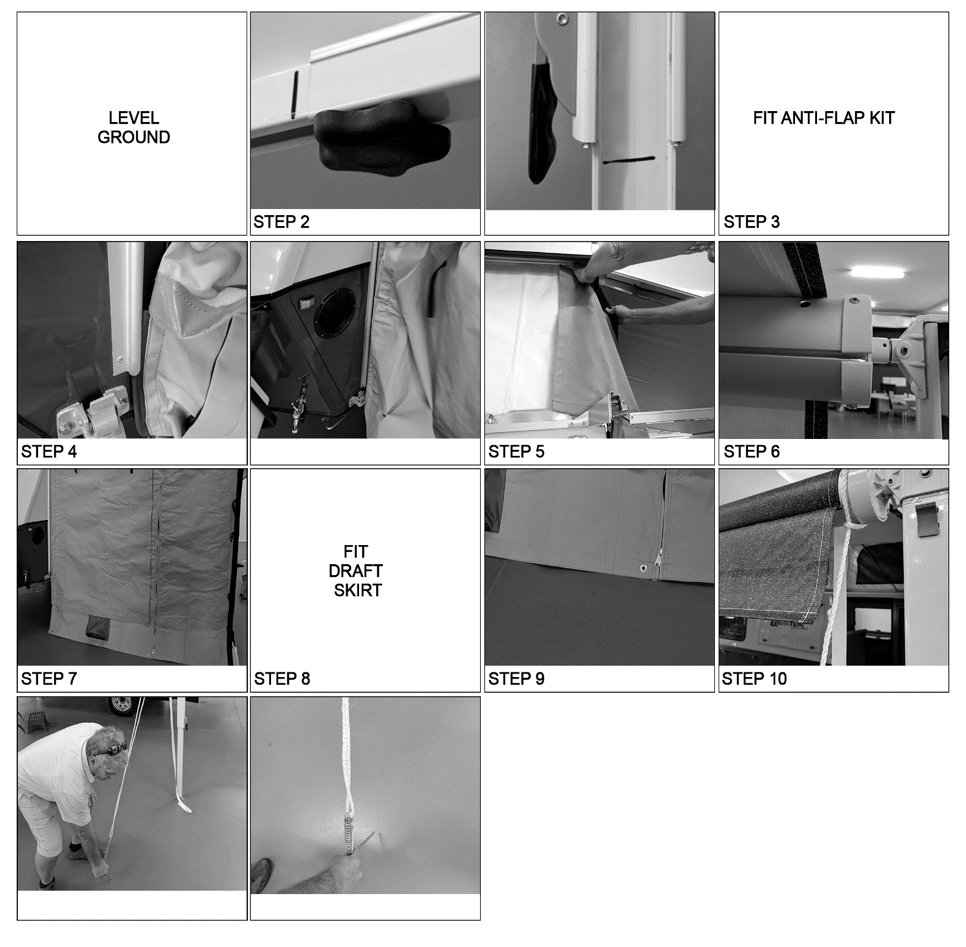
Try to choose a site where your trailer can be positioned on reasonably level ground. This assists with levelling the trailer and will make sleeping more comfortable.
If adjustment is necessary across the width of the trailer, drive the trailer’s downhill wheel up onto a chock prior to detaching the trailer from the vehicle. Use a small spirit level to assist you.
After uncoupling the trailer, wind the jockey wheel handle up or down to level it along its length. Once the trailer has been levelled, lower the rear legs and front legs and adjust for support.
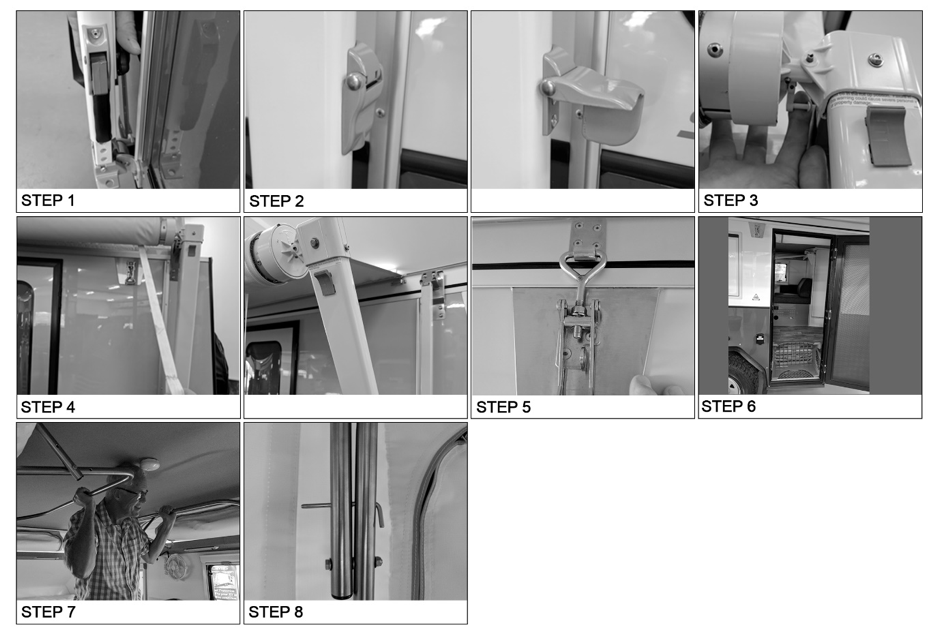
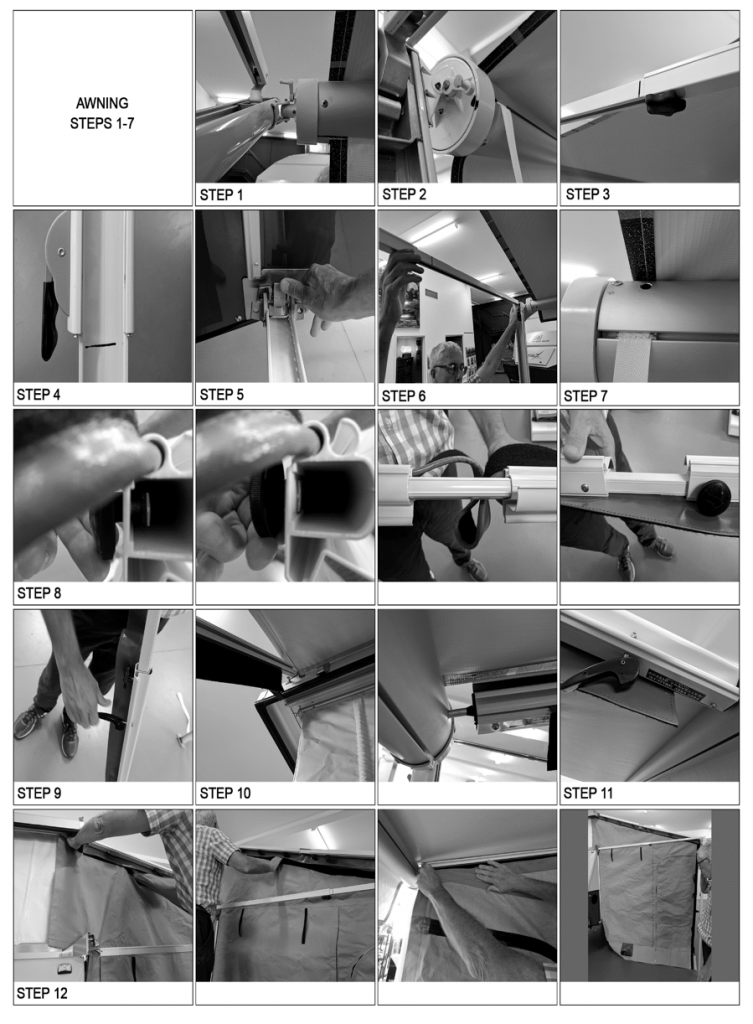
Raising The Pop Top Roof (Quantum, Quantum Plus, Odyssey and Matrix Pop Top Models Only)
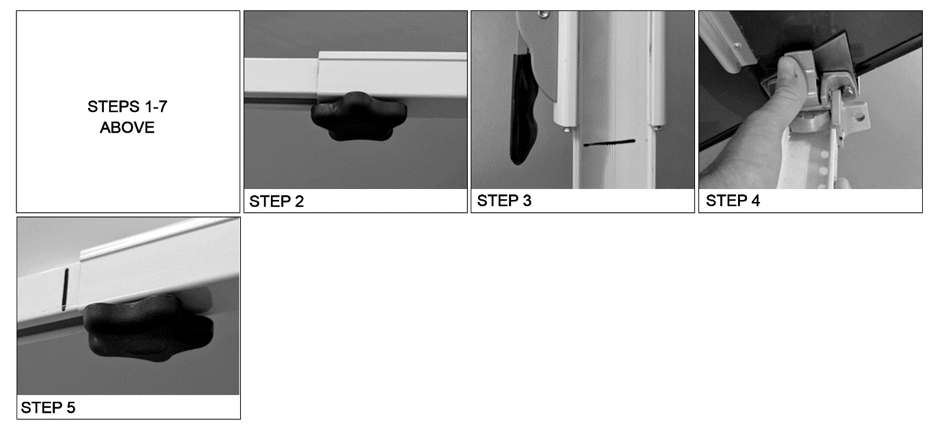
- Loosen the black wheel behind the front and rear awning leg
- Lift the grey lever on front and rear awning leg
- Pull down latch at top or rear awning drum
- Firmly grasp white awning drum strap and pull down and outwards approximately 60cms
- Undo all 6 silver roof latches (4 for the Odyssey)
- Open the door and step inside the trailer, taking care that the door does not come into contact with the awning drum
- Push up on the 2 lift arms until roof is fully raised
- Using the 2 pins (found in the top vanity drawer) insert one into each of the holes in the roof lifters
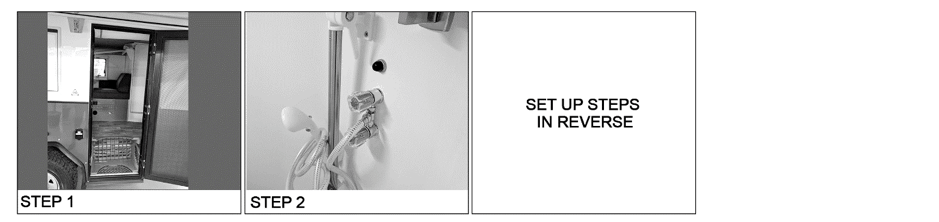
Lowering The Pop Top Roof (Quantum, Quantum Plus, Odyssey and Matrix Pop Top Models Only)
- Make sure the trailer door is open
- Make sure the shower arm is down
- Repeat set up steps outlined above in reverse
Awning Setup – Awning Out Legs Attached To Trailer
Note: Roof must be raised before awning is set up
- Loosen the black wheel behind front and rear awning leg
- Lift up grey lever on front and rear awning leg
- Pull down latch found at top of rear awning drum
- If anti-flap device is to be fitted, awning needs to be fully extended so hole near drum is exposed
- Once desired awning length is achieved, tighten front and rear black wheel
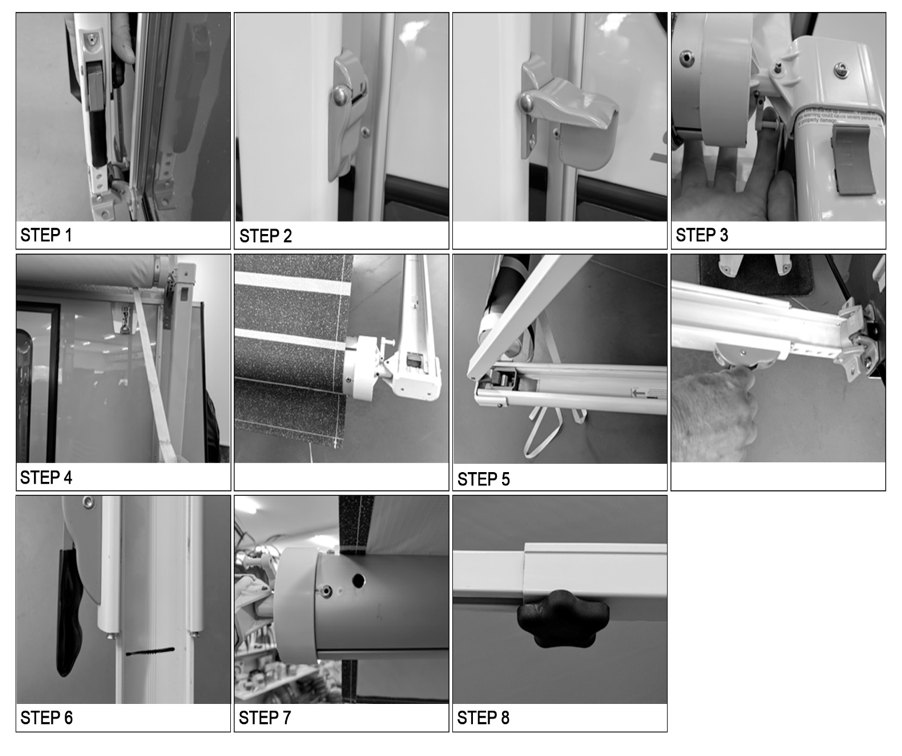
Awning Setup – Legs in Vertical Position
- Perform steps 1 – 7 as above
- Ensure black wheel is still loose
- Adjust awning arm so it is level with black indicator line on the awning arms using the black lever
- Release front and rear grey bottom clip, pushing awning leg outwards until it is level on the ground and awning is taut
- Tighten black wheel
Pull Down Awning
To put down reverse set up procedure outlined above.
Anti-Flap Kit Setup
Perform steps 1 – 7 in Awning setup as above.
- Pull drum leaver back whilst holding tension on the awning with the drum strap and pull back
- Lock the latch in line with the black dot on the end of the awning drum
- Tighten black wheel on front and rear awning arm
- Pull black leaver out and slide awning arm up to black line and lock both sides
- If you wish to put the awning legs down so they are vertical, do so now, otherwise they can be left in the up position. To put legs down, release front and rear grey clip and push awning leg outwards until it is level on the ground and awning is taut
- Slide awning arm out so that hole in the drum is exposed
- Hole needs to be sitting at 1o’clock
- Take the anti-flap kit out of bag and assemble by feeding the two parts together and ensure the black wheel is flush with the side
- Undo all 6 black leavers
- Attach the flattened clip end of the anti-flap kit to the roof and feed the metal spigot into the hole
- Tighten the black levers on the anti-flap kit
- Attach Velcro on end wall to the Velcro on the anti-flap kit – check it is firmly attached from both the inside and outside
Annex Set Up
- Annex walls are made to fit the trailer on level ground, so it must be levelled both front to back and side to side before annex is setup
- Set up awning to black paint marks on awning legs and spreader bars (marks on rear end of awning barrel must be aligned)
- Fit anti-flap kit as per instructions above
- Front and back end walls – attach Velcro at top of wall to Velcro strip fitted to the anti-flap kit. Start at the cut out on the wall for the trailer roof at the highest point working out towards awning barrel
- Slide Kedar (black spline) downwards into the sail track on trailer wall
- Long side wall – slide Kedar into the built-in sail-track on the awning barrel starting at the front end
- Attach the 3 Velcro tabs on side of end walls to the awning legs
- Fit draft skirt to the side of the trailer and attach Velcro at front and rear ends to the end walls
- Peg out the bottom of all walls and draft skirt using supplied pegs through the eyelets in bottom hem
- Use supplied ropes and pegs to secure awning legs
- Fit supplied annex mat to floor area
Note: Annex walls should not be left up in windy conditions. Please read awning instructions carefully.